Overview
To install and execute an iOS application on TestGrid devices, the application's IPA file must be provisioned with the UDID of the target TestGrid device. This guide explains how to obtain the device UDID from TestGrid, register the device in the Apple Developer Portal, update the provisioning profile, and generate a new IPA file that can be installed on TestGrid devices.
Prerequisites
Before you begin, ensure you have:
Access to the TestGrid portal.
Access to an Apple Developer account.
Appropriate permissions to manage certificates, devices, and provisioning profiles.
Access to the application's source code and Xcode project.
An existing Apple Development or Distribution certificate.
A provisioning profile associated with the application.
Part 1: Obtain the Device UDID from TestGrid
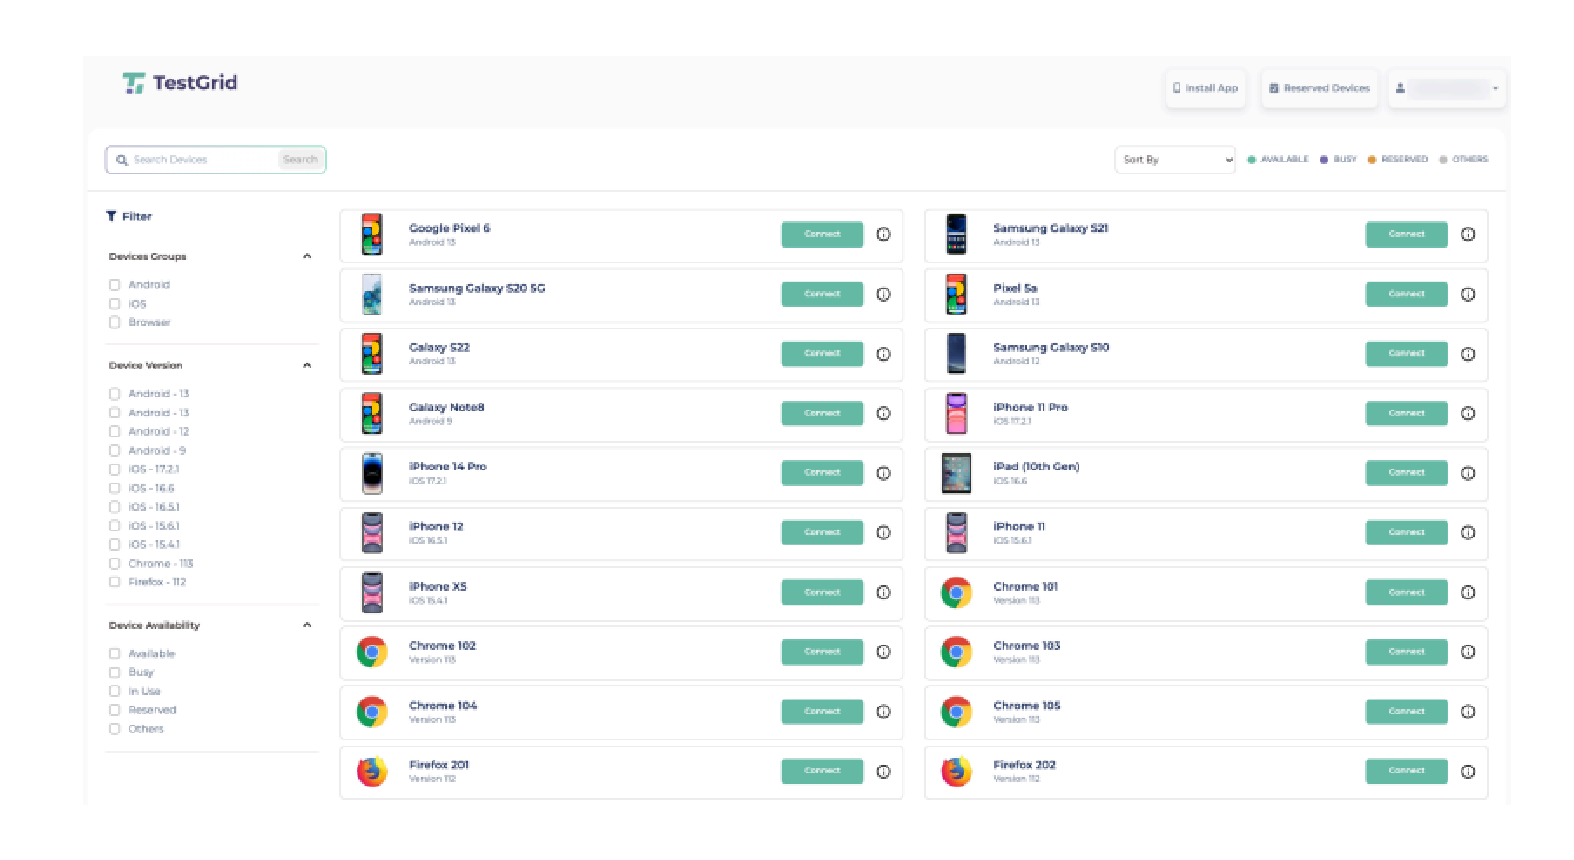
Step 1: Log in to TestGrid
Sign in to the TestGrid portal.
Navigate to Real Device Cloud from the left navigation menu.
Step 2: Open Device Information
Locate the iOS device on which you want to install the IPA.
Click the Info (i) button next to the device.
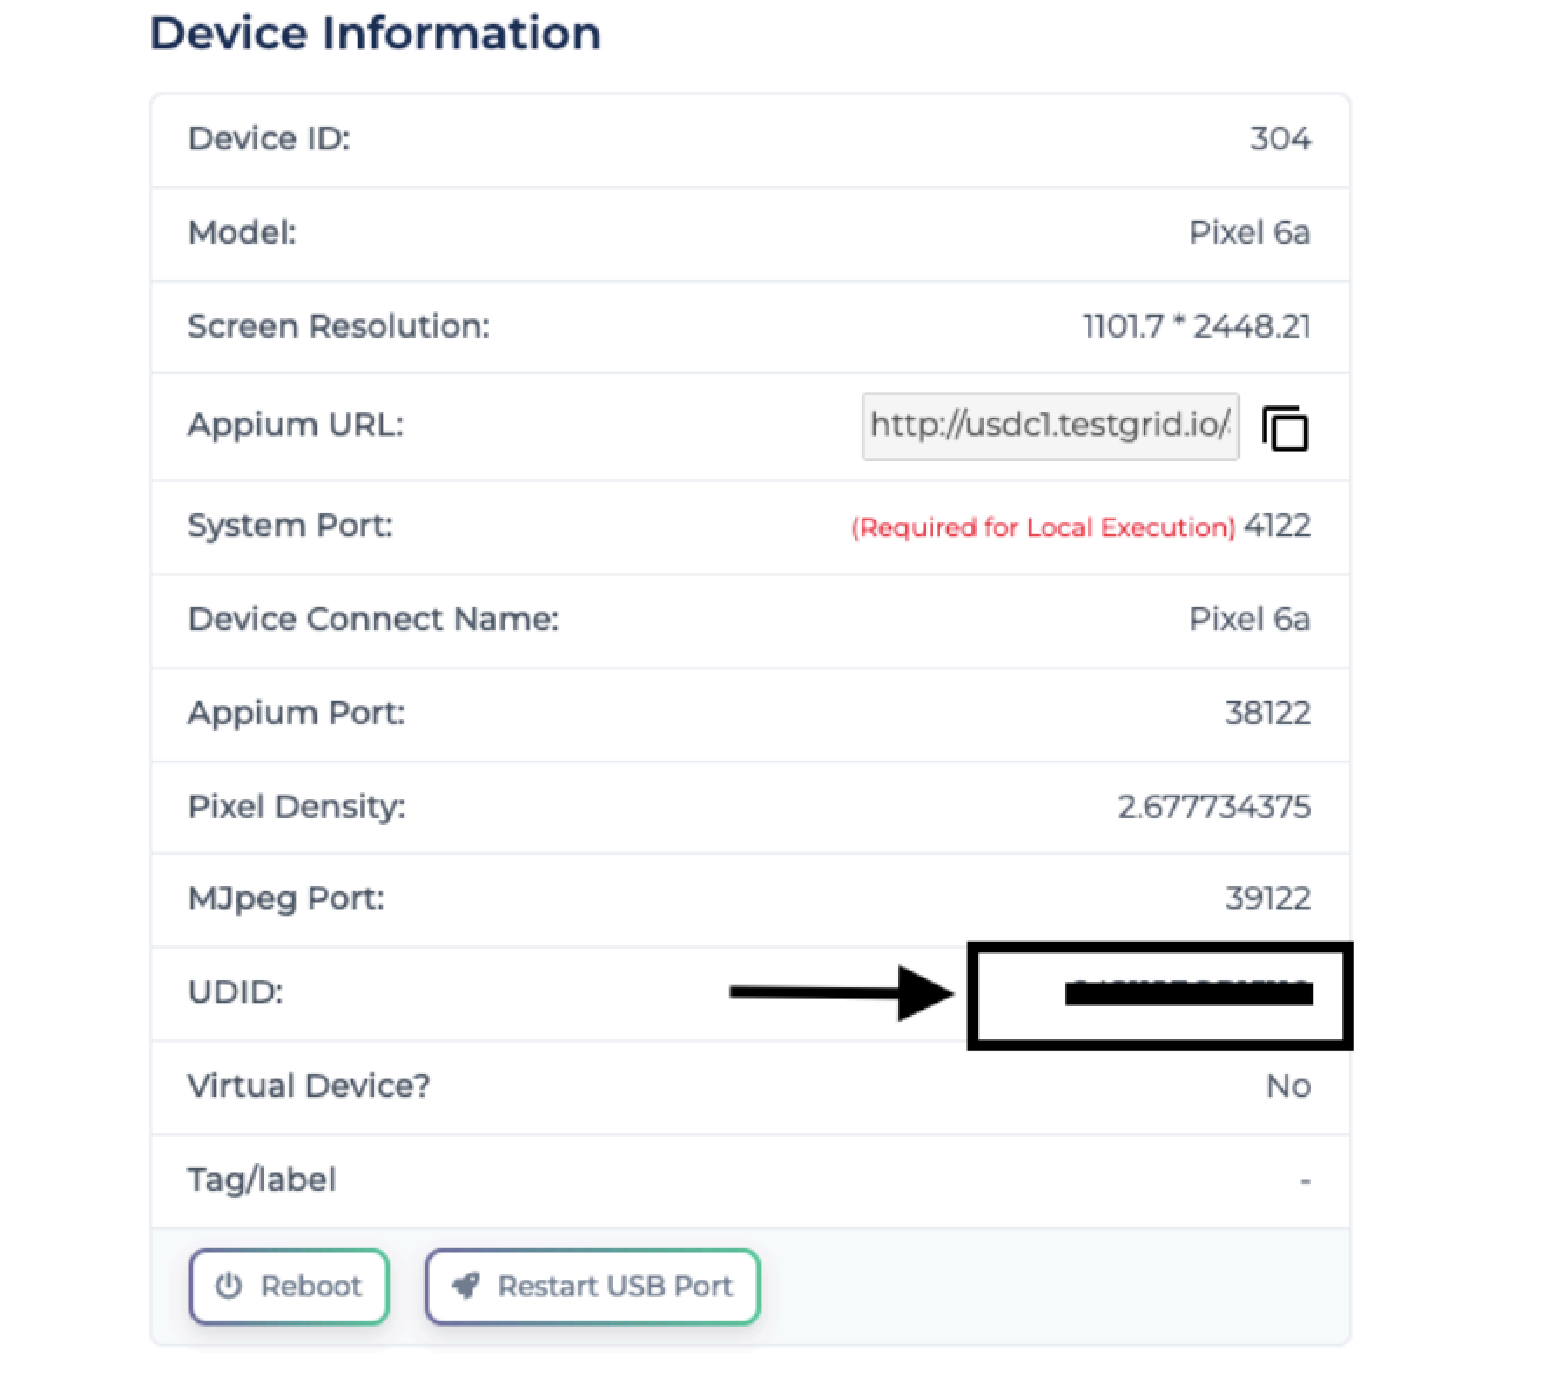
Step 3: Note the Device UDID
Review the device information panel.
Copy the following details:
Device Name
UDID
Save these details for use in the Apple Developer Portal.

Part 2: Register the Device in Apple Developer Portal
Step 4: Open Apple Developer Portal
Navigate to:
Sign in using your Apple Developer account.
Step 5: Open Device Management
Navigate to Certificates, Identifiers & Profiles.
Select Devices from the left menu.
Step 6: Register the TestGrid Device
Click the + button.
Select Register Device.
Enter:
Device Name
UDID collected from TestGrid
Click Continue.
Click Register to complete device registration.
Part 3: Update the Provisioning Profile
Step 7: Open Provisioning Profiles
Navigate to Profiles within the Apple Developer Portal.
Step 8: Edit the Existing Provisioning Profile
Locate the provisioning profile associated with your application.
Click Edit.
Step 9: Select the App ID
Verify that the correct App ID is selected for the application.
Step 10: Add the TestGrid Device
From the device list, select:
The newly registered TestGrid device, or
All devices, if required.
Continue to the next step.
Step 11: Generate the Updated Profile
Click Generate.
Download the updated provisioning profile to your system.
Part 4: Generate a New IPA File
Step 12: Import the Updated Provisioning Profile
Open the downloaded provisioning profile.
Import it into Xcode.
Step 13: Configure Code Signing
Open the application project in Xcode.
Select the project from the left navigation panel.
Open Build Settings.
Search for Code Sign.
Configure both Debug and Release profiles to use the updated provisioning profile.
Step 14: Build and Archive the Application
From the Xcode menu, select:
Product → Archive
Generate a new application archive.
Export the archive as a new IPA file.
Outcome
Upon completion of this guide, you will have:
Retrieved the UDID of the target TestGrid device.
Registered the device in the Apple Developer Portal.
Updated the application's provisioning profile.
Generated a new IPA file signed with the updated provisioning profile.
Prepared the application for installation and execution on TestGrid iOS devices.
Was this article helpful?
That’s Great!
Thank you for your feedback
Sorry! We couldn't be helpful
Thank you for your feedback
Feedback sent
We appreciate your effort and will try to fix the article